 ©
©
|
©
|
|
Back to the general motherboard/CPU info page Next: Benchtesting of the motherboard/CPU/memory assembly!
I thought I'd mention that the motherboard in these photos is an example of a full-sized ATX motherboard, versus the smaller microATX motherboard pictured in the rest of the guide. As you can see, it's more rectangular and has more of the white PCI slots on it. 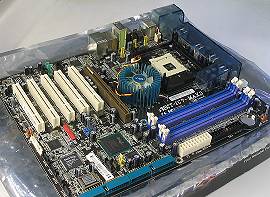 For this installation, I'm going to be using the feature-loaded Abit IC7-MAX3 motherboard : ) 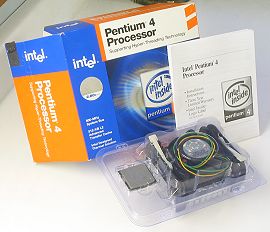 And of course, a CPU is needed. I'm going to be using a retail boxed Intel P4 2.8C with the stock cooler. 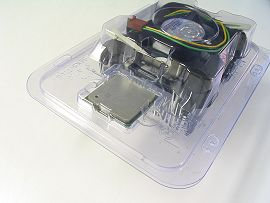 Another shot of the CPU and cooler. Phew, almost time for a snack break already! : )
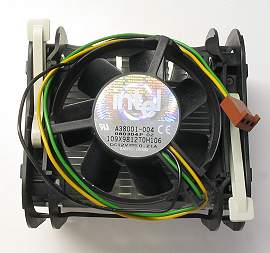 The stock Intel Cooler itself. 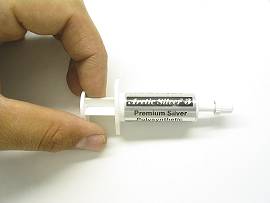 Here's one of the most important items in the installation of any CPU heatsink; the TIM (Thermal Interface Material). In this case I'm using Arctic Silver 3 due to its easy spreadability, and good performance. 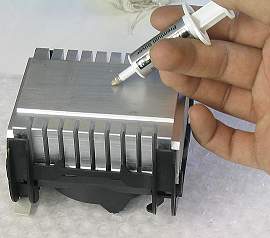 Notice in this picture that the base of the heatsink is bare aluminum. All retail heatsinks come with a black patch of TIM, but I scraped it off so I could apply the AS3 for better cooling results.  Next, clean up the base with some Isopropyl Alcohol and let it dry. Spread some compound out on the heatsink. *Note: I'm putting the compound on the base of the heatsink because I can see the outline of the impression left by the P4 IHS (Integrated Heat Spreader) when pressure is applied. In most cases, it would probably be easier to apply the compound to the heatspreader of the CPU.* 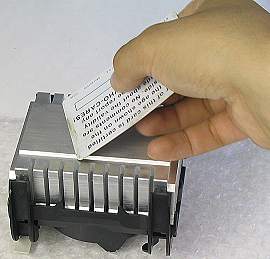
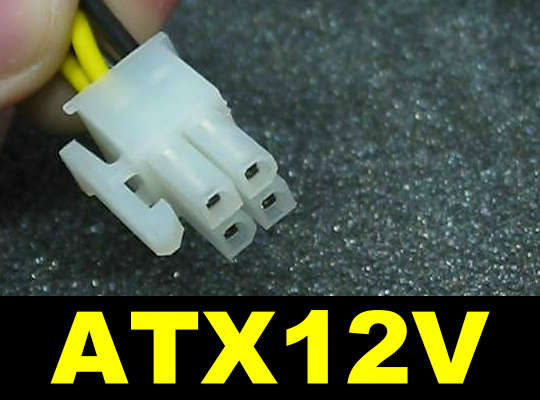
Now grab an old credit card, library card, or some other card with a hard, flat, plastic edge, first spread around the compound to cover the whole contact area. After it's been spread, go back, and screed it into a paper thin layer using the edge of the card... 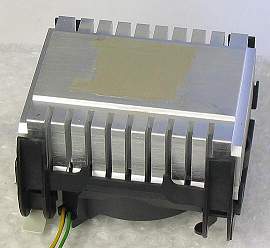 ...Like so.  I scraped any extra compound on the edge of the card onto the IHS, but that's a personal preference ;). Also, notice that little gold triangle in the top left corner of the CPU, take note of it; you will need to remember that for later. 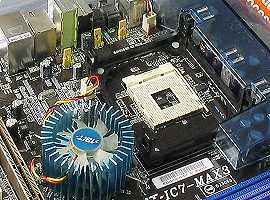 Now onto the actual installation! Here's the CPU socket (478 Pins). Clear that CPU socket of any dust or debris and clear the area around it. 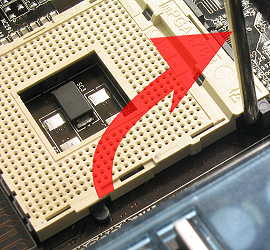 Now, raise the small metal arm (or plastic perhaps) on the CPU socket and push it all the way up. Also, take notice to the pin layout. See how on the socket in the corner near the hinging mechanism, there are 2 pin holes missing? That's so you know the orientation of the CPU. This principle applies to both Intel and AMD CPU's and motherboards. 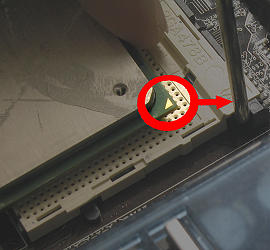 Remember the gold triangle? This is where you need to remember it ;) That triangle should be pointed towards the hinging mechanism on the CPU socket. If you turn over the CPU, there should be 2 pins missing there. That should match up the layout on the socket. Carefully place the CPU in the socket. I can't over-emphasize "carefully". The pins on the Intel P4 processors are very thin and fragile compared to those of AMD Athlon XP pins and they can bend very easily.  Place the CPU in the socket, and let it fall into place, don't force it. Press gently on the IHS to make sure it is fully seated. 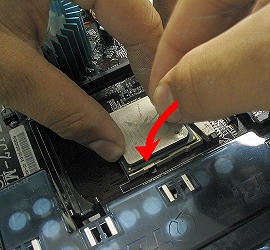 Next, hold the CPU down in the socket, and lower the locking lever. There are a few points of resistance when lowering the lever. Don't be scared, just be patient and calm, and just apply a little more pressure. You're done installing your P4 CPU! Now onto the HSF! : ) 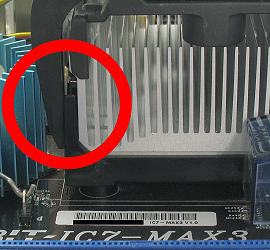 Place the heatsink onto the CPU and let the clips on the sides just hang over the retention clip. Pull the heatsink off again and make sure there is good contact between the CPU and its heatsink. Place the heatsink back on, and now put a little pressure on the heatsink clips to engage them onto the retention clip. You can simply put some pressure right on the top of the clips where the white levers are, just push there on either side and it should just *pop* into place. Also make sure the clips are in place in the holes. 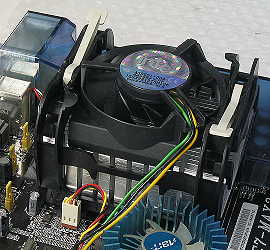 Almost there! Now this can be another nerve-wracking moment for any n00bie PC builder using a P4. Grab the white levers on the top of the cooler, and cam them in the opposite direction that they are (this is kind of hard to explain and perhaps to visualize, so a short video might be put up soon). There is a lot of tension once the clips are about 90° to the heatsink. Don't overtorque it, just put gentle, steady pressure onto the levers and it should all clip together. 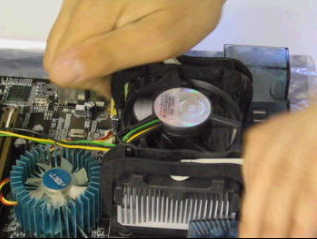 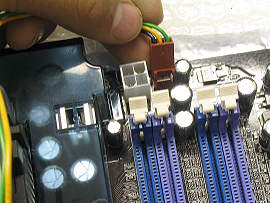 Finally, don't forget to plug in that fan connecter. There should be a 3-Pin CPU fan header near the socket; plug in the fan. While we're on the topic of plugging in things and since this picture kind of kills 2 birds with one stone, make sure you plug in the 12V P4 power header from your powersupply. If you don't the computer most likely won't POST, or it will not work properly. That's it, you're done! Now use the rest of mechBgon's guide to finish up your computer. Crack open a cold drink, and enjoy. : )
|