 ©
©
|
©
|
|
Back to the general motherboard/CPU info page Next: Installing the hard drive ~ Caution ~ Remember that all the parts shown here are easily damaged by static shocks. Frequently touch a grounded object such as the plugged-in computer case before and during the handling of these items. Your best option is to install the CPU and heatsink while the motherboard is outside the case. Lay it on cardboard. Below: the heatsink/fan unit that came with this retail-boxed AthlonXP.  What you should know about SocketA processors
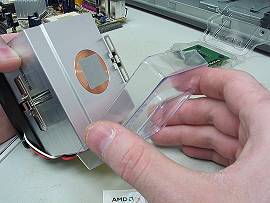
Here's the unstepped end of the AthlonXP's heatsink, and notice that the chromed clip has no screwdriver receptacle on this end. 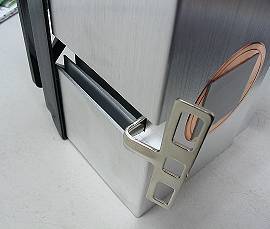 Here's the stepped end of the AthlonXP's heatsink. This end of the clip DOES have a receptacle for a screwdriver tip. 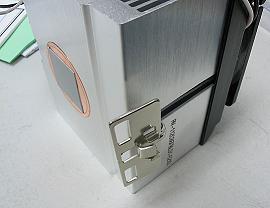 Raise the lever on the side of the CPU socket: 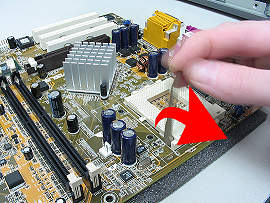 Look at the CPU. Oh hey, it has a gold triangle on one corner. 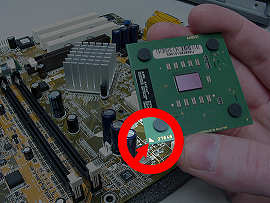 For a Socket A processor (Athlon and Duron families and SocketA Semprons), the gold triangle needs to go in the position shown below (pointing at the lever), because the CPU has an asymmetrical arrangement of pins and it only fits into the socket this way. This applies to Intel Pentium4's and Celerons too, but NOT to Athlon64. 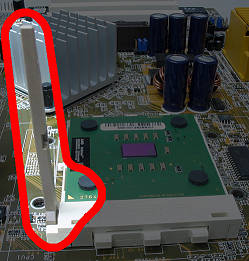 If your CPU doesn't drop effortlessly into the socket, inspect its pins very closely from all directions... some of them might be slightly bent. Straighten them carefully, or return the CPU if necessary. Hold the CPU down and lower the lever to secure it into the socket. 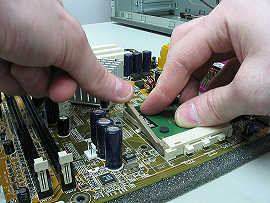 The critical moment As you can see, the raised, solid-plastic end of the CPU socket is towards the camera, and so is the stepped end of the heatsink base and the screwdriver-friendly end of the chromed steel heatsink clip. This is the correct orientation. The step in the heatsink's base provides the needed clearance over the raised, solid-plastic end of the CPU socket.  Clipping down a SocketA heatsink takes a fair amount of force, so don't be shy. : ) For the record, I can engage these wide three-lug clips with my bare hands, so if you're strong, you might try that first.
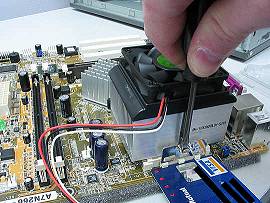 Another option: don't use a screwdriver in the first place. : ) Use a socket-driver, or a screwdriver that's got a hollow shaft to accept interchangeable tips. The hollow end of the driver can go right over the tang that's sticking out of the heatsink's clip, as shown below. 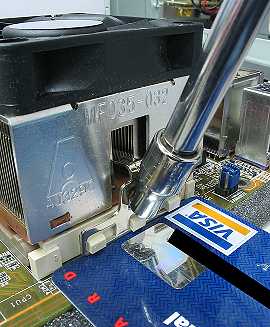 Plug the heatsink's fan into the fan header on the motherboard. I put a loop in the fan's power cable, partly to take out the slack and partly because it may help reduce EMI. Notice that the plug goes onto the header only one way by design, as depicted below. 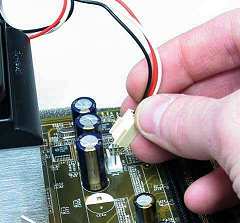 You can locate the correct fan header by reading the motherboard owners' manual. : ) |